How to Line Perforated Tart Rings
November 2025
Perforated tart rings are the secret to bakery-quality tarts. They allow heat and steam to circulate evenly, producing a crisp, golden crust - without the need for docking or pie weights. This simple tool brings pâtisserie level tarts to the home kitchen.
Looking for a recipe? Try my fruit tartellettes recipe featuring a crisp, golden pâte sucrée.
Equipment
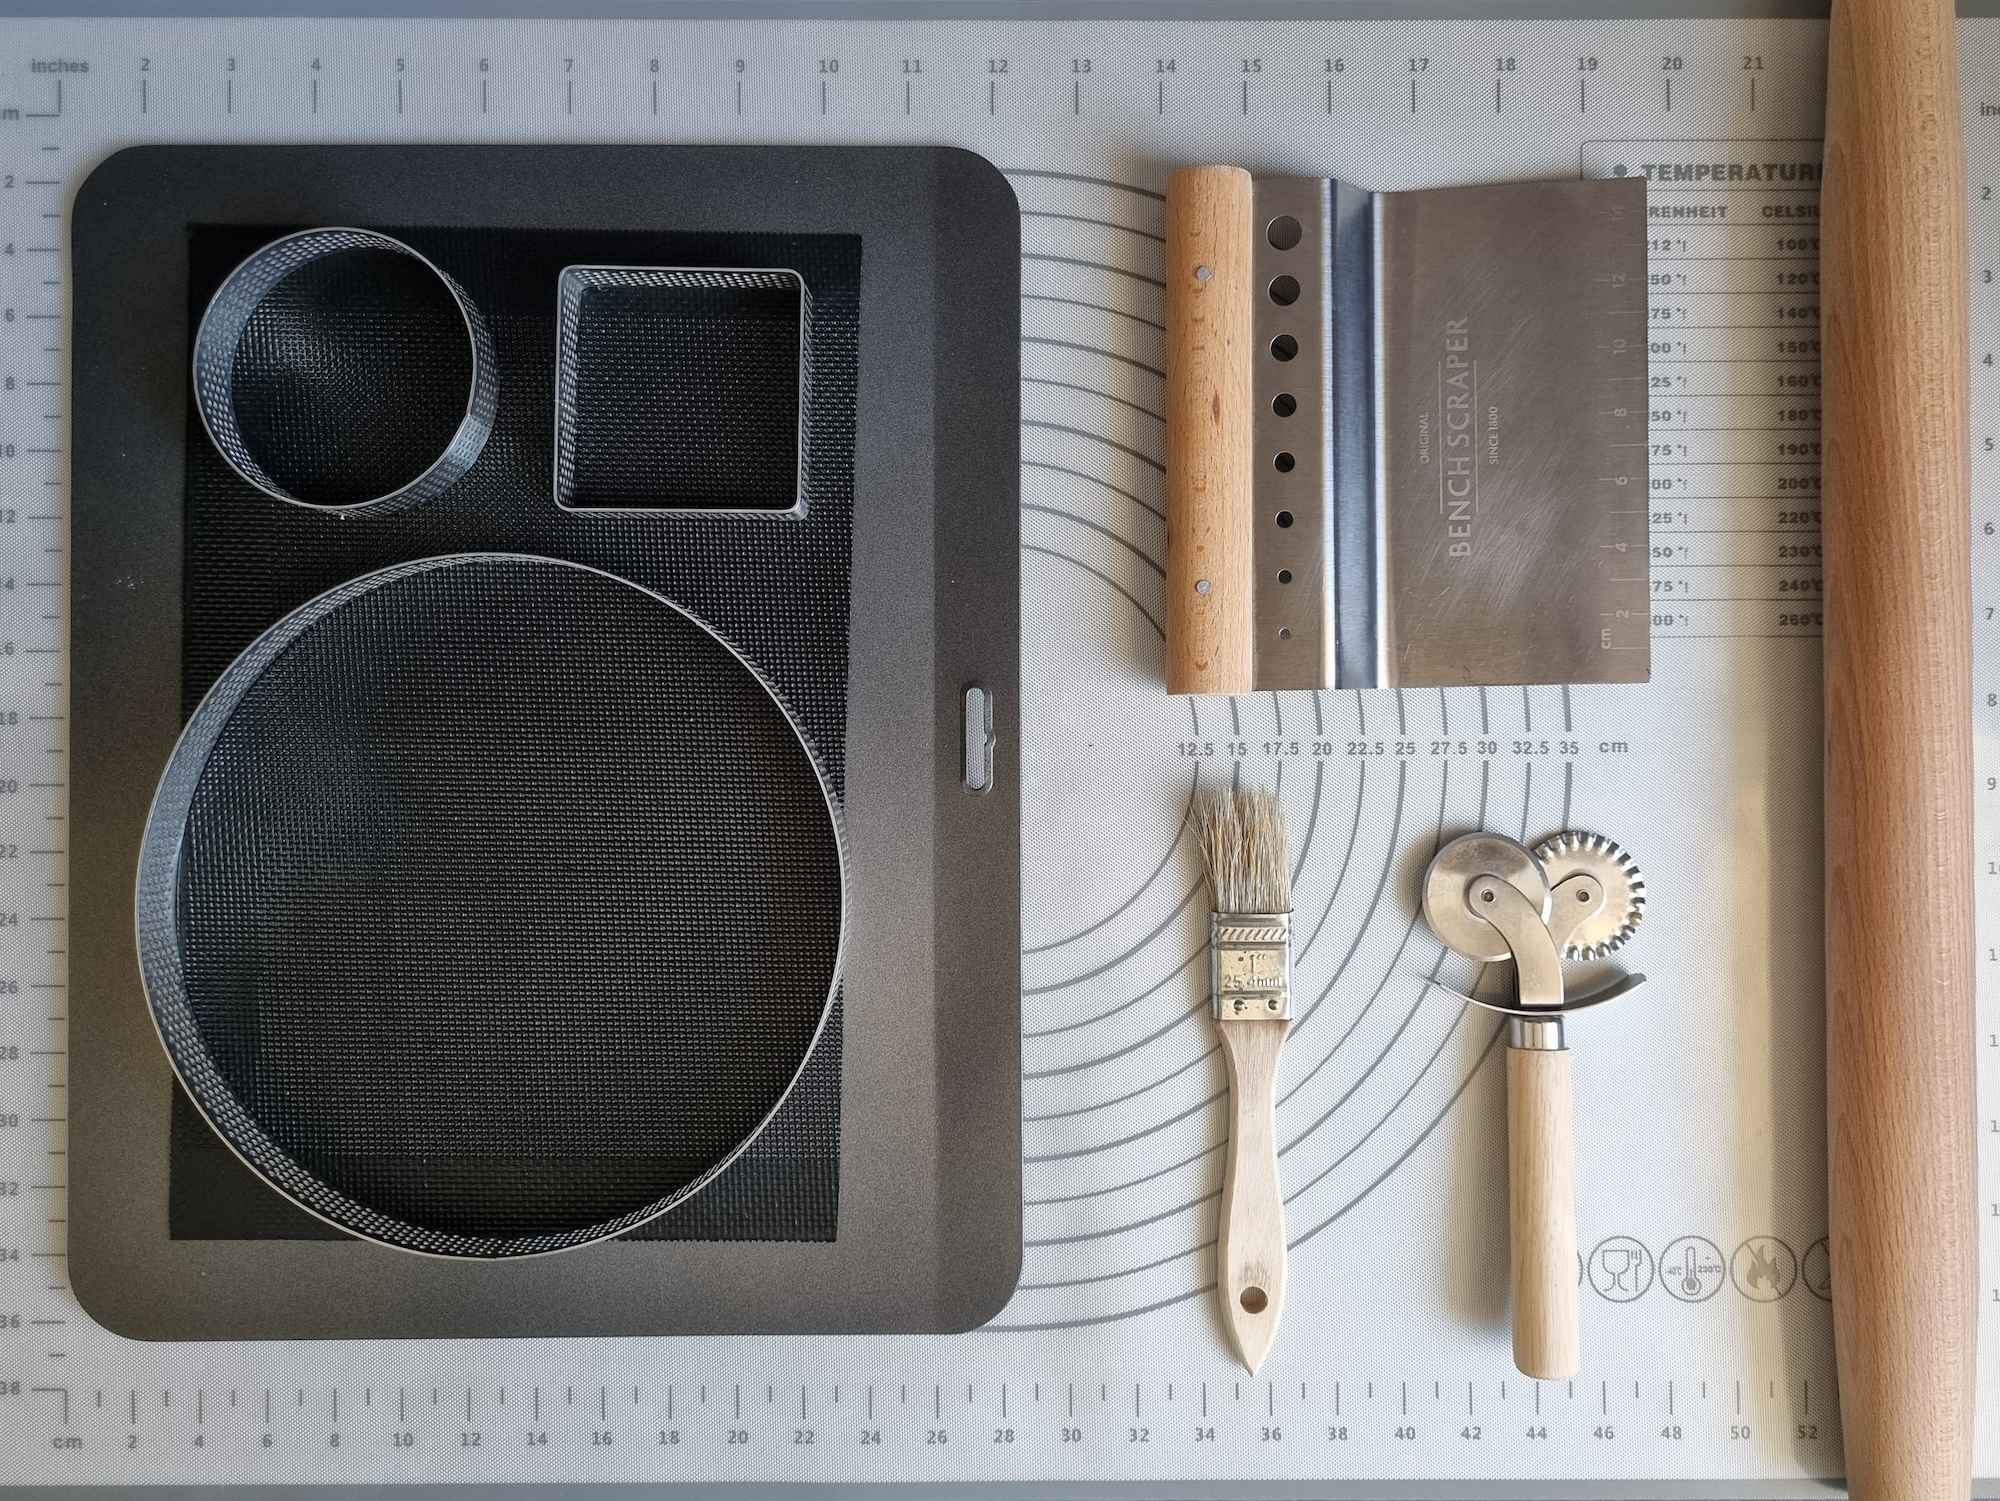
The key equipment required are the perforated tart rings and a perforated tart mat. The perforations in the rings allow the heat and steam to escape and circulate evenly, and the mat provides the same effect for the tart base.
A bench scraper makes it easy to lift and move the dough without warming it with your hands. If you don't have a bench scraper, a spatula or cake smoother can be used instead. Baking trays are also important - I like to use one tray for freezing the tart crust and then transfer it to a second tray for baking. This helps prevent extreme temperature changes and reduces the risk of warping, which could dislodge the crust from the shell and deform it.
Equipment
- Perforated tart rings.
- Perforated silicon baking mat.
- Rolling pin.
- Pastry cutting wheel or knife.
- Bench scraper.
- Optional brush to dust excess flour.
- Optional silicone pastry mat for rolling out the dough.
- Baking tray.
- Optional microplane grater to smooth the baked crust.
The Steps
These steps will guide you through the process of using perforated tart rings, ensuring a beautifully baked tart crust. If the dough starts to soften or feel to warm while working with it, pause and chill it in the refrigerator or freezer for a few minutes before proceeding.
Preparation
Place a perforated baking mat on a baking tray. Lightly butter the inside of the tart rings and preheat the oven according to your recipe. Using fan mode ensures a more even bake, but conventional mode works perfectly fine. You may wish to rotate the tray towards the end of baking for even browning.
Make sure there is room in the freezer for the baking tray.
Rolling the Dough
Remove the tart dough from the refrigerator and let sit for a few minutes. When pressed with a finger it should be cool and pliable, leaving a small indent while still holding together.
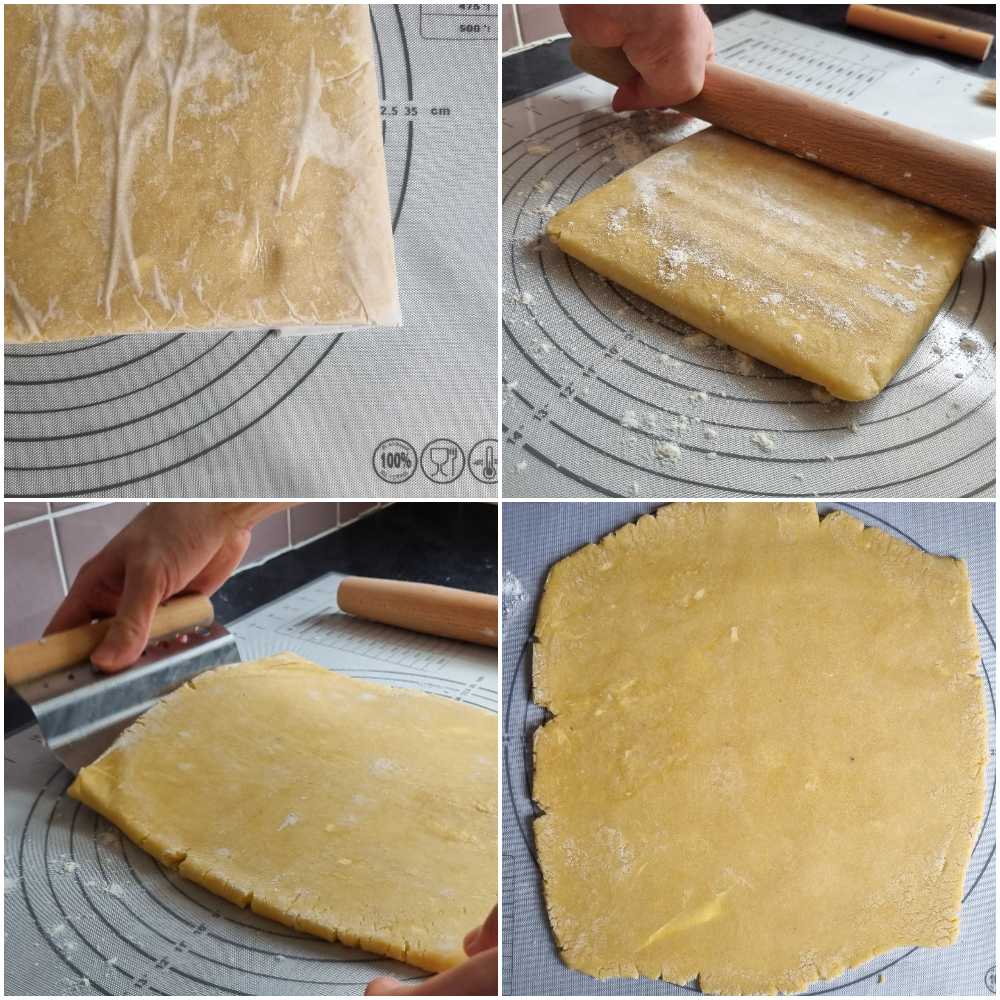
Lightly flour your work surface and the top of the dough. Using a rolling pin, gently press all along the dough, then rotate the rolling pin 90 degrees and repeat. This technique helps the dough become more pliable and easier to roll out.
Roll out the dough, using a bench scraper to help lift and rotate it occasionally to prevent sticking. Roll out to an even thickness of 3-5mm.
Lining the Tart Rings
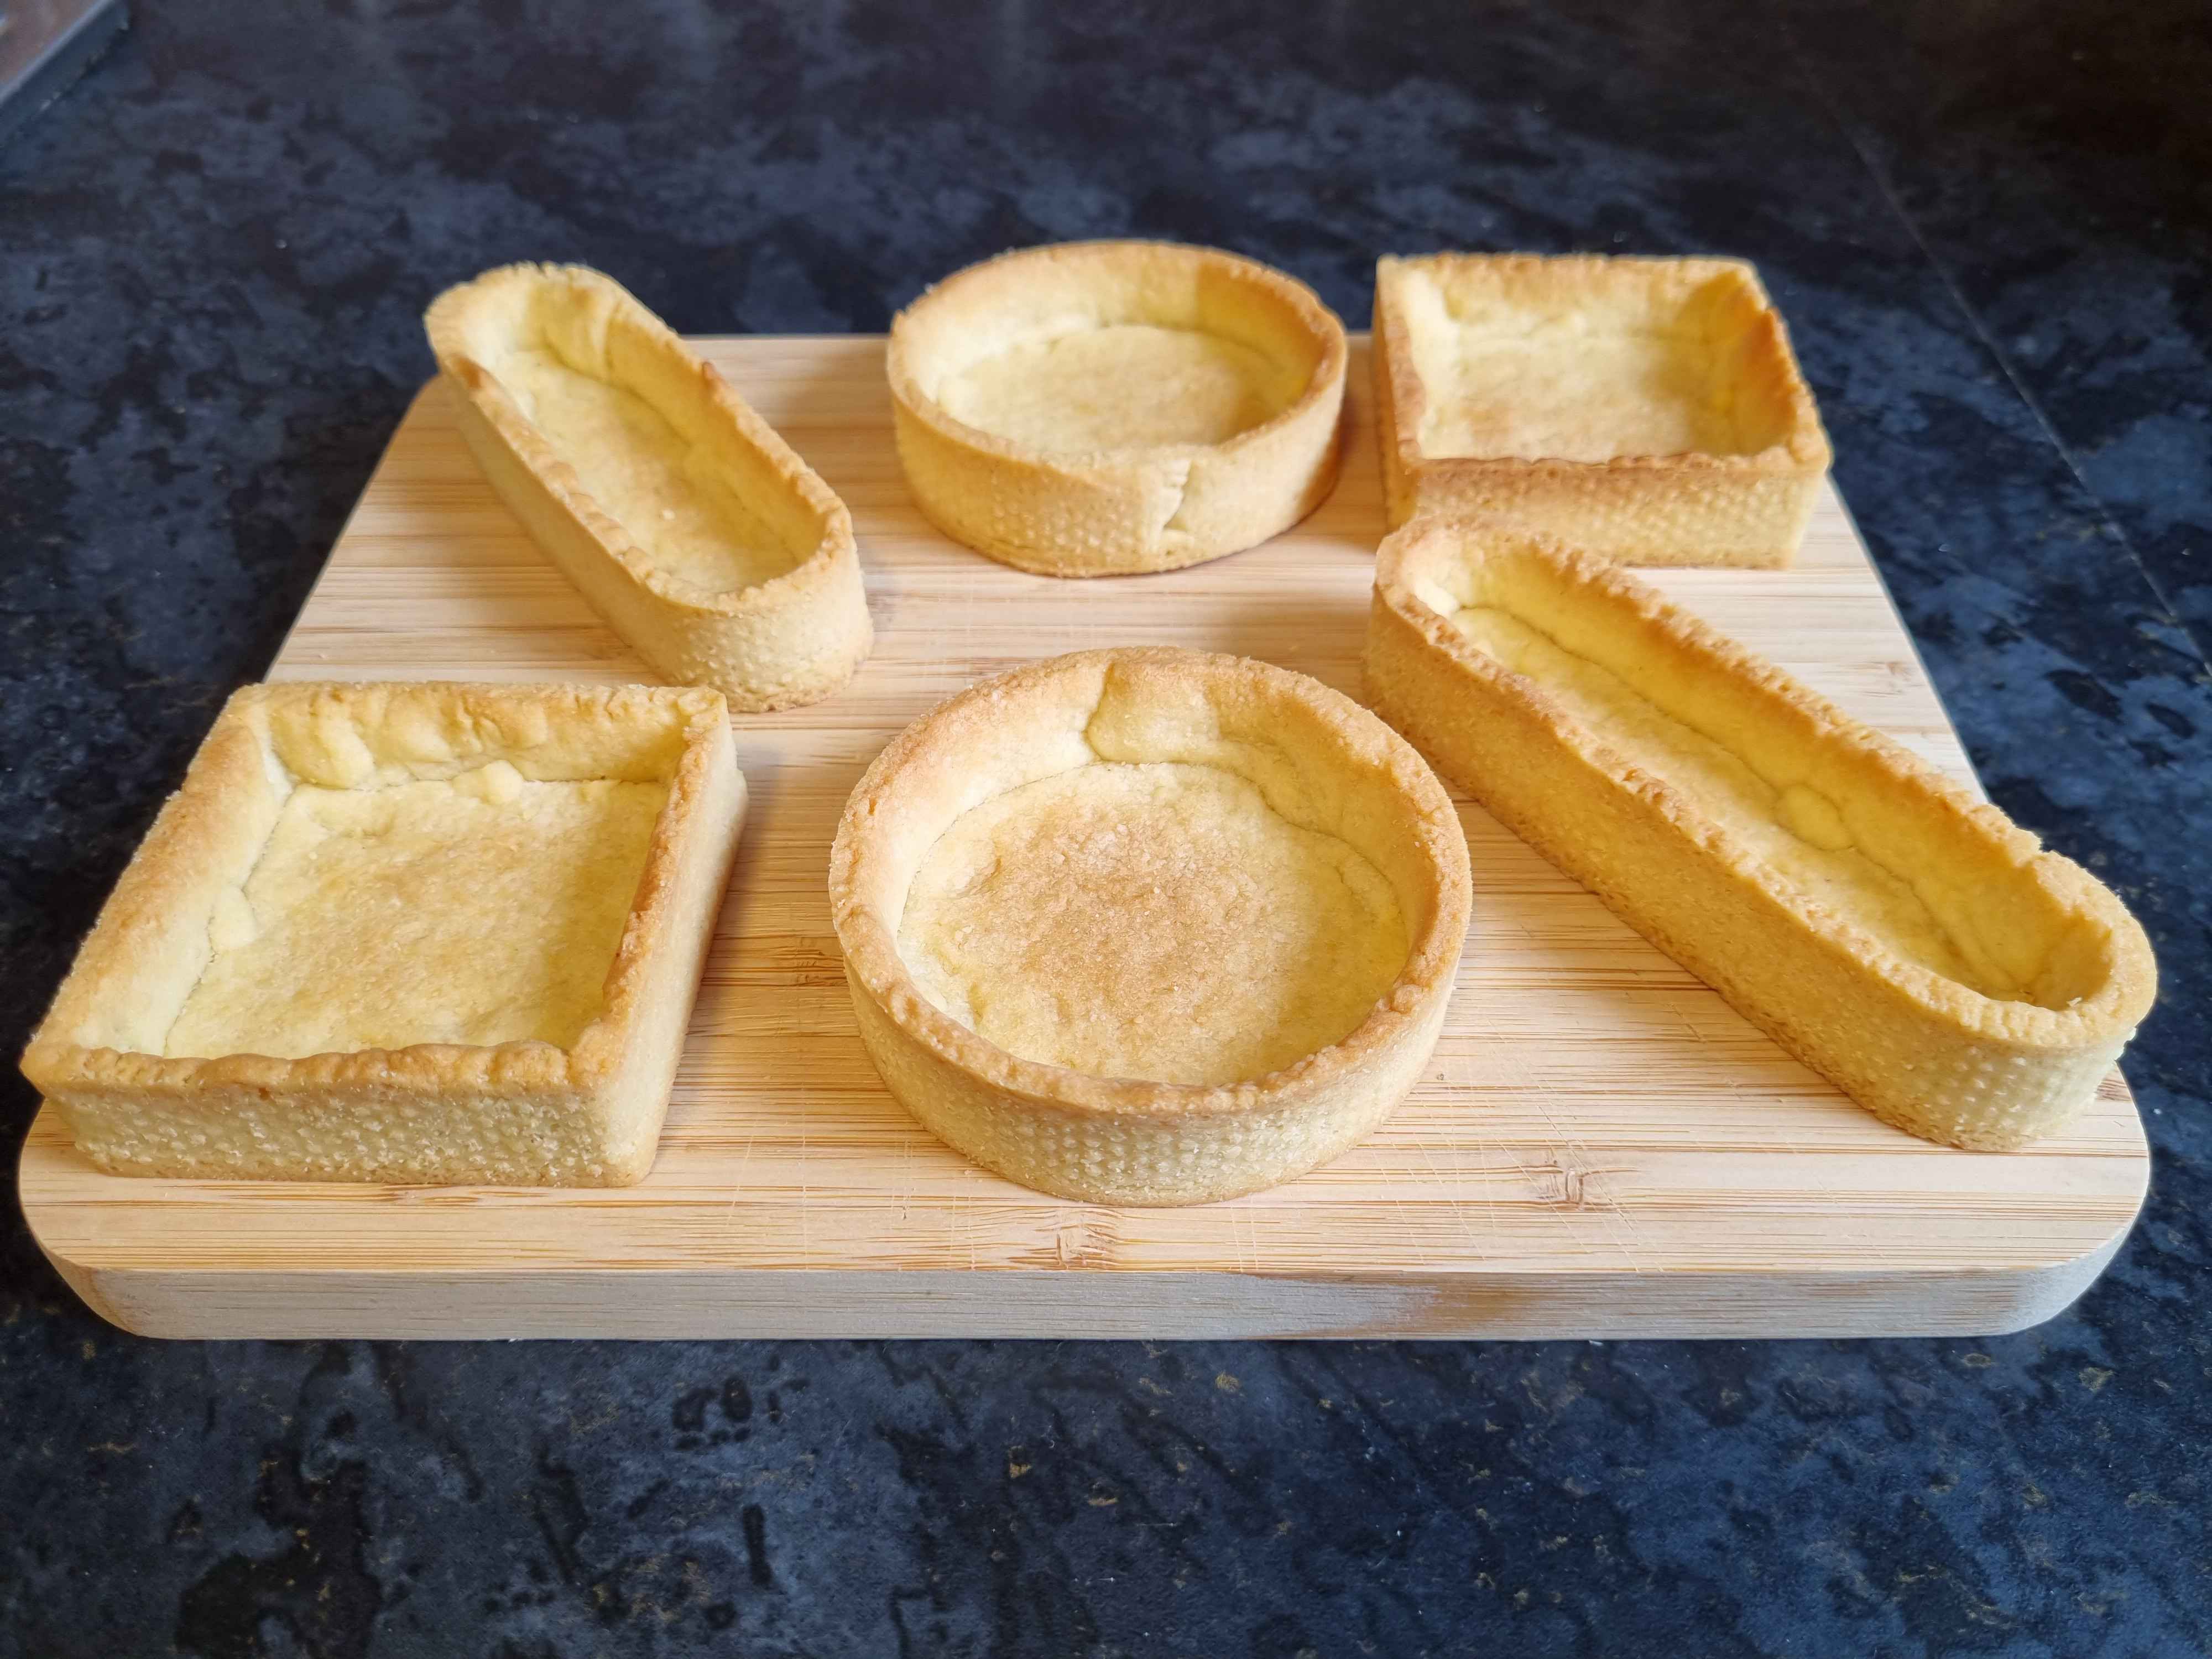
Use each tart ring itself to press and cut out the bases. Place the tart ring onto the baking tray with the perforated mat. If the cut-out crust comes up with the tart ring, great, if not place the tart ring onto the baking tray and use the bench scraper to lift and place it into the ring.
Once all the bases are cut and placed on the baking tray, use a pastry cutting wheel or knife to cut long strips from the remaining dough. You can use the rolling pin as a guide for straight lines. Line the inside of each tart ring with these strips, breaking them to fit and pressing the ends together with the warmth of your finger to seal. If needed, use smaller pieces in the same way to complete the lining. Proceed with these steps no matter the shape of the ring, but for square and rectangle rings be sure to press the sides into the corners. The dough will protrude above the sides of the ring but that's fine - we'll take care of it in the next step.
Press the dough gently into the sides of the rings so it slightly fills the perforations, helping it stay in place while baking.
Gently press the sides of the dough into the base where they meet to help seal the crust. I like to use small pieces of leftover dough, placed sparingly around the ring, to reinforce the seal between the sides and the base.

Place the baking tray with the rings into the freezer for 15 minutes.
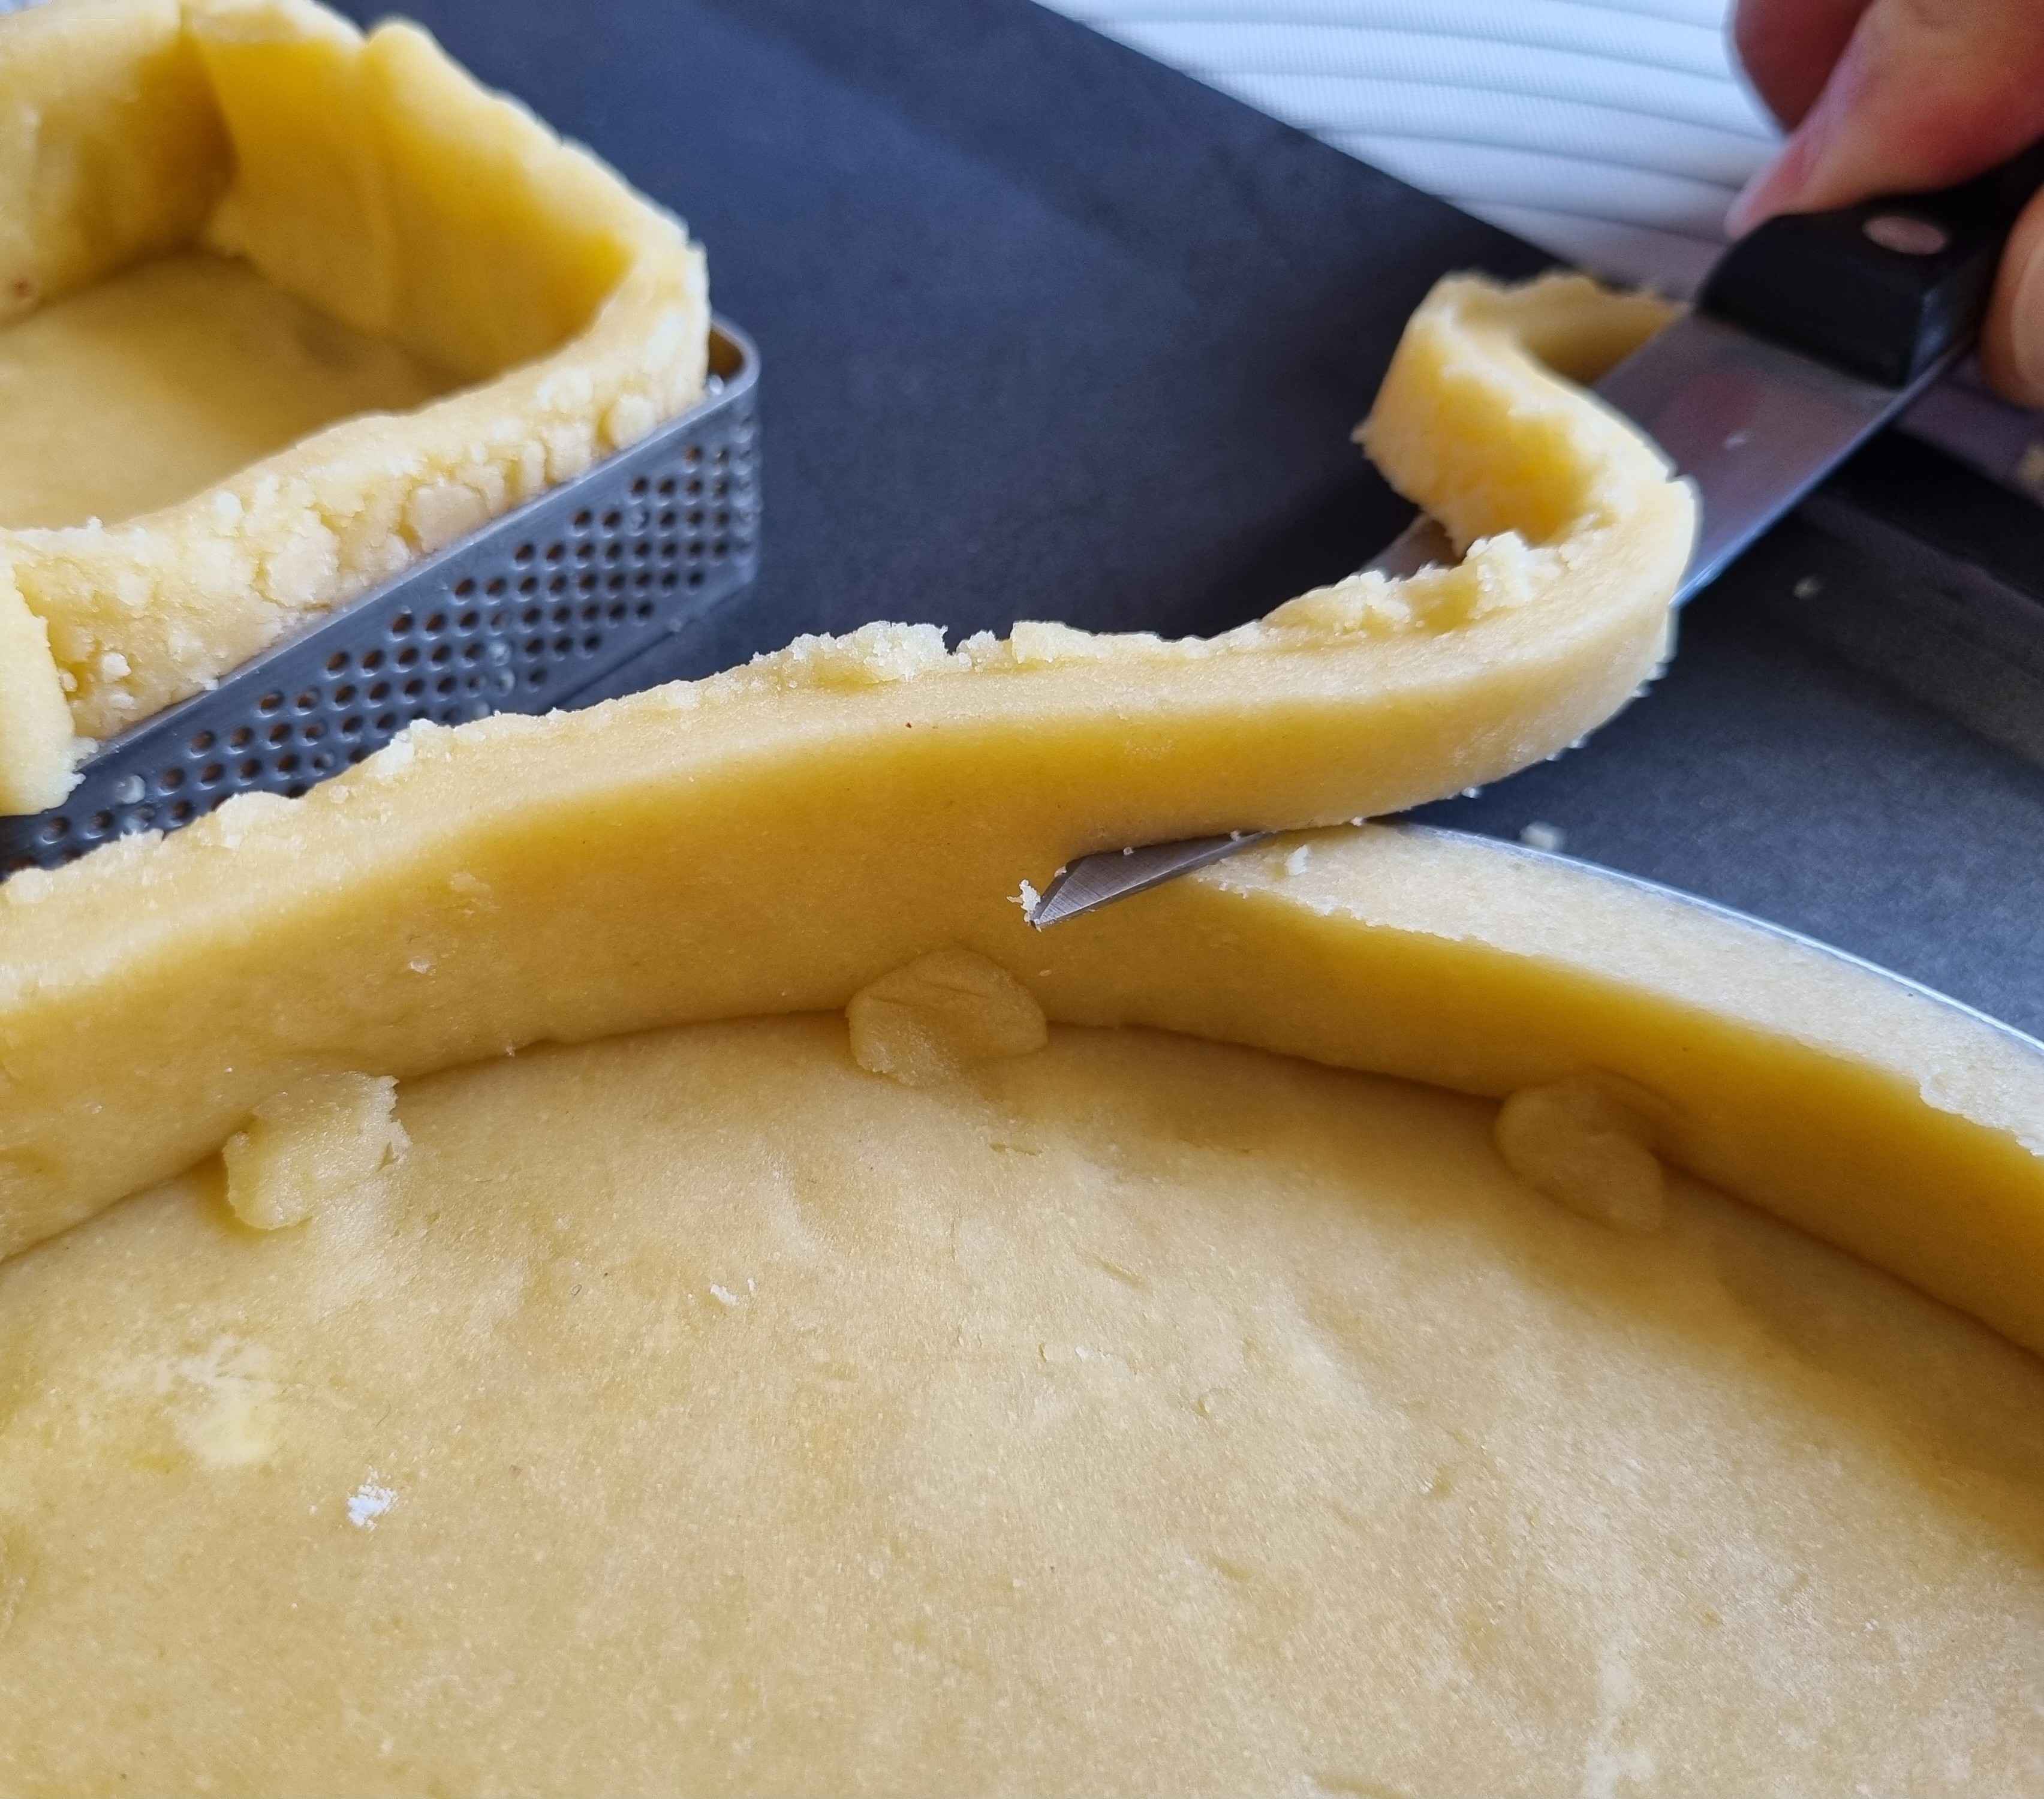
Trimming Excess Dough
Take the tray out of the freezer and trim the dough protruding above the rings with a knife. Press the sides of the dough into the rings once more to ensure it is in place.
Return to the freezer for 5 minutes.
Baking
Remove the tray from the freezer. At this stage, I recommend transferring the frozen tart shells to a second baking tray to reduce the risk of warping from sudden temperature changes. To do this, lift the perforated baking mat with the crusts on it, and place onto the second tray. From here you can bake the crusts as they are, or add any filling that needs to be baked along with them.
Bake according to the recipe's instruction. Because there are perforations in the rings and the mat, no docking or pie weights are required. Once baked, remove from the oven and let cool for 5 minutes.
The rings are easiest to remove while the crust is still warm. Use a fork or another utensil to gently lift the rings - be careful as they will be hot. Let cool completely.
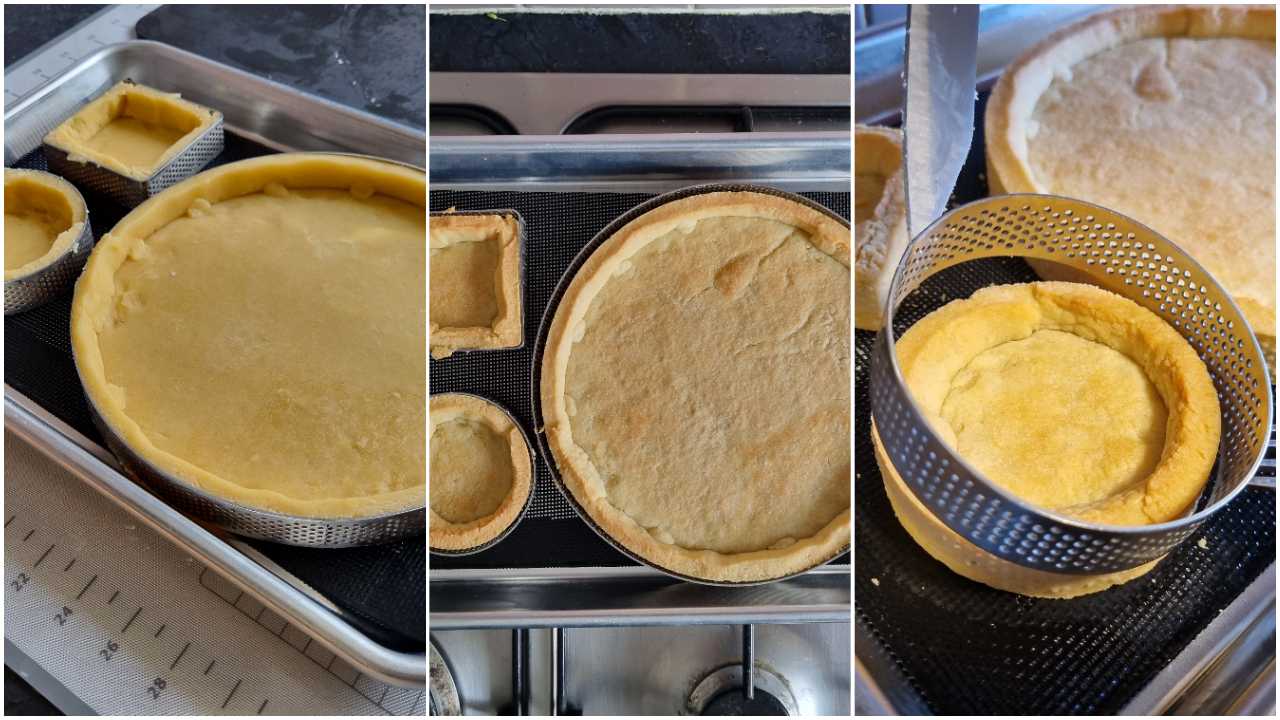
Finishing Up
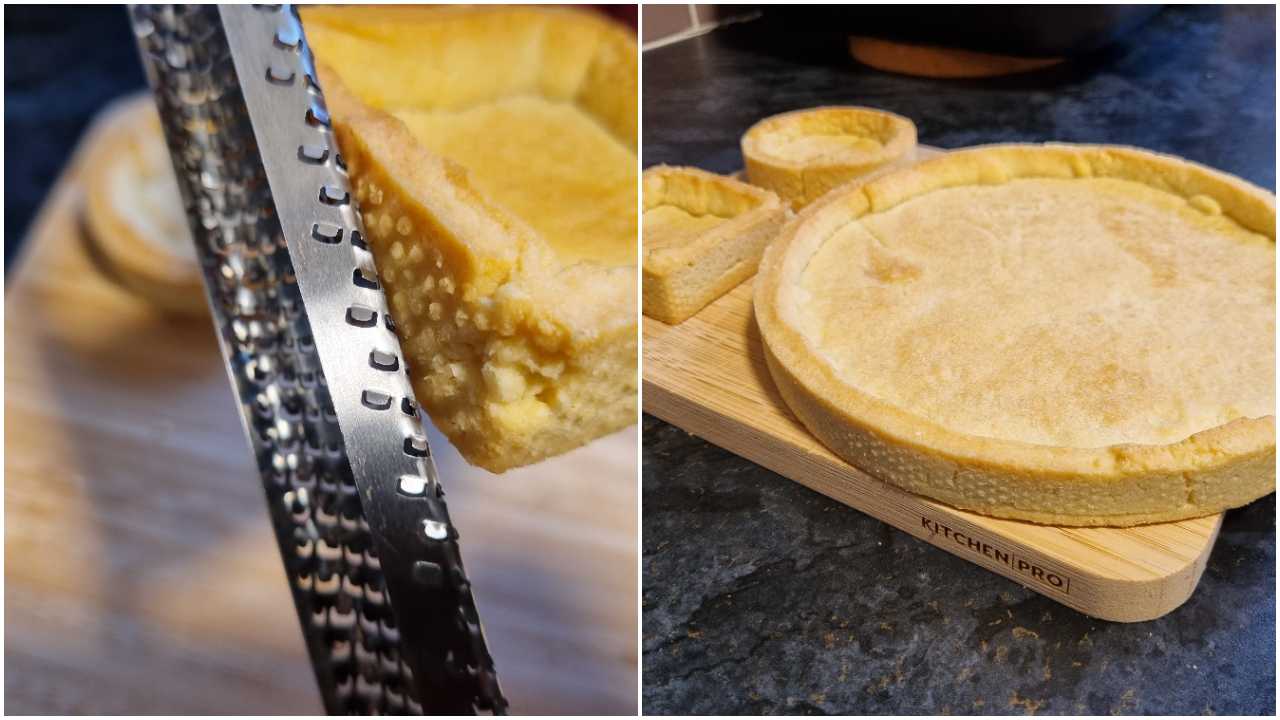
Once the tart shells have cooled completely, use a microplane grater to smooth the sides of the crust where the perforation holes are visible. This is optional, but gives the tarts a cleaner, more professional look.
Store in an airtight container at room temperature for 1-2 days.